> ## Documentation Index
> Fetch the complete documentation index at: https://docs.trendzspot.com/llms.txt
> Use this file to discover all available pages before exploring further.
# Raw Footage Editor
> Upload any raw video and get a fully edited, publish-ready video — with captions, transitions, B-roll, hooks, and motion graphics added automatically by AI.
This tool is built for creators who record but hate editing. You upload your raw footage, tell the AI how you want it edited, and walk away with a polished, professional video. No timeline. No manual cuts. No editing experience needed.
## **How to generate a raw video to a fully edited video:**
Upload any raw video and get a fully edited, publish-ready video—with captions, transitions, B-roll, hooks, and motion graphics added automatically by AI.
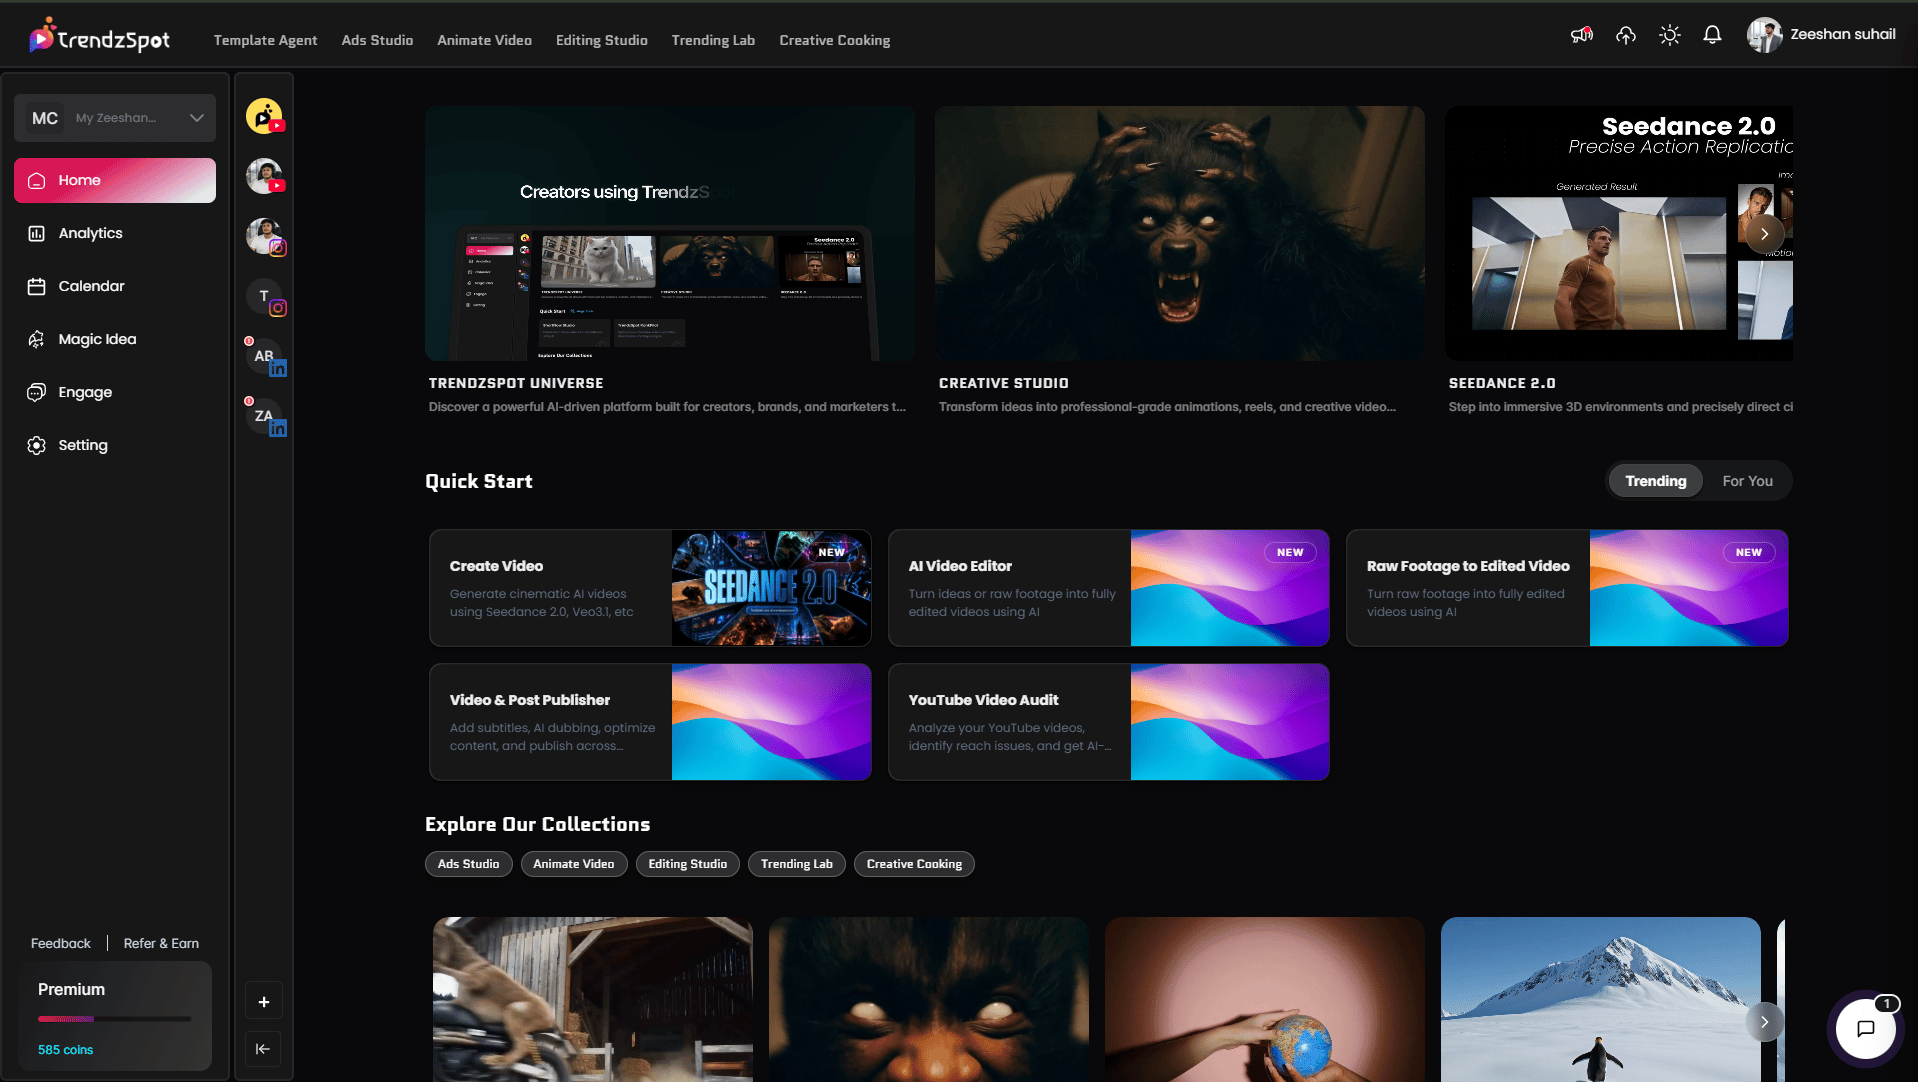
From your TrendzSpot AI dashboard, click **Raw Footage to Edited Video** to open the editing workspace. This is where you upload your footage and give the AI its editing directions.
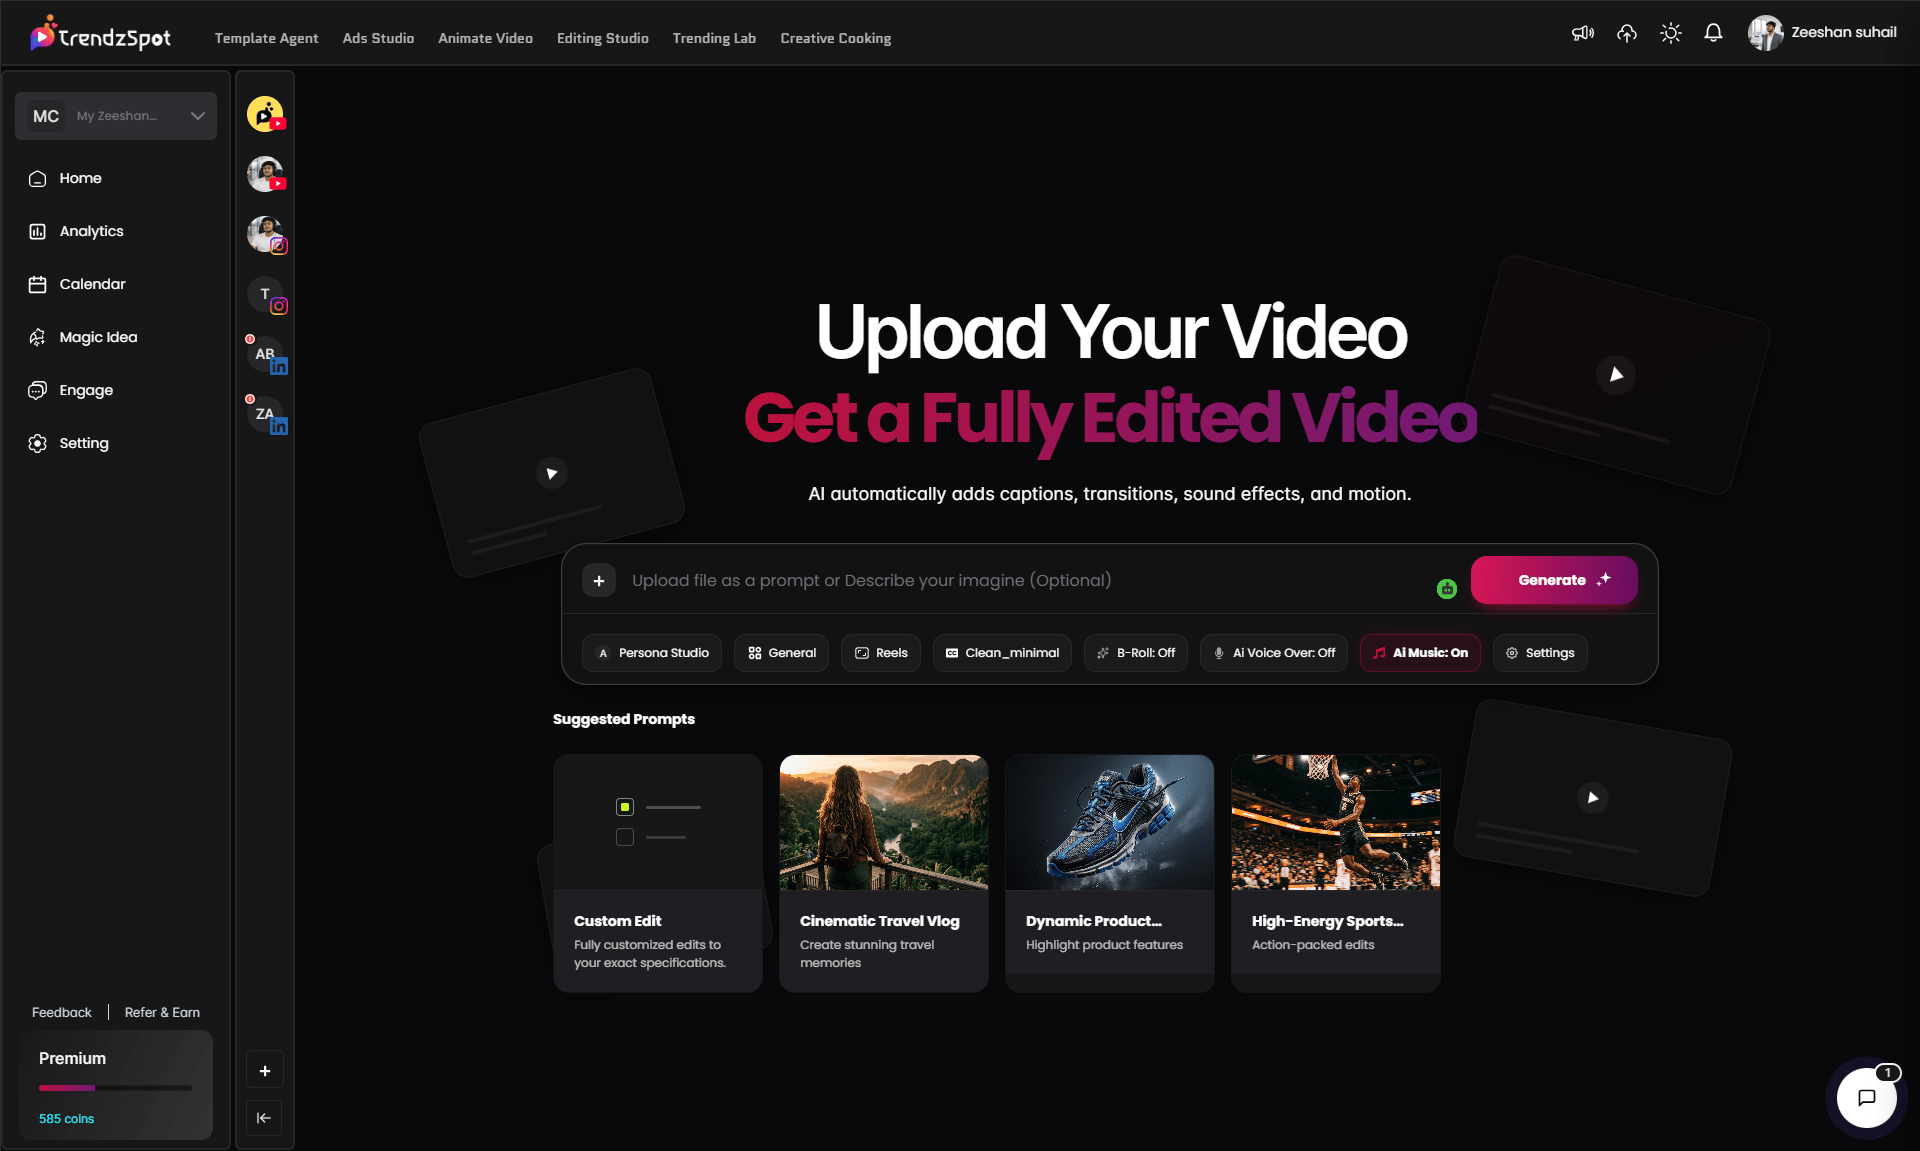
Upload your raw video file — maximum **3 minutes** in length. Once uploaded, you have two ways to direct the AI on how to edit it:
**Option A — Describe it yourself:** Type a free-form description of how you want the video edited. You can also add your own uploaded images and video clips directly inside the description by typing **@** and selecting from your assets. Use **Highlight:** to emphasize important words or call-to-actions, and **Transition:** to control scene changes.
Example:
```text theme={"theme":{"light":"vitesse-light","dark":"vitesse-dark"}}
Show:@user_assets:1
Show:@user_assets:2[5s:10s]
Transition: Zoom In
Transition: Fade
Highlight: Comment "FACELESSVIDEO"
```
\
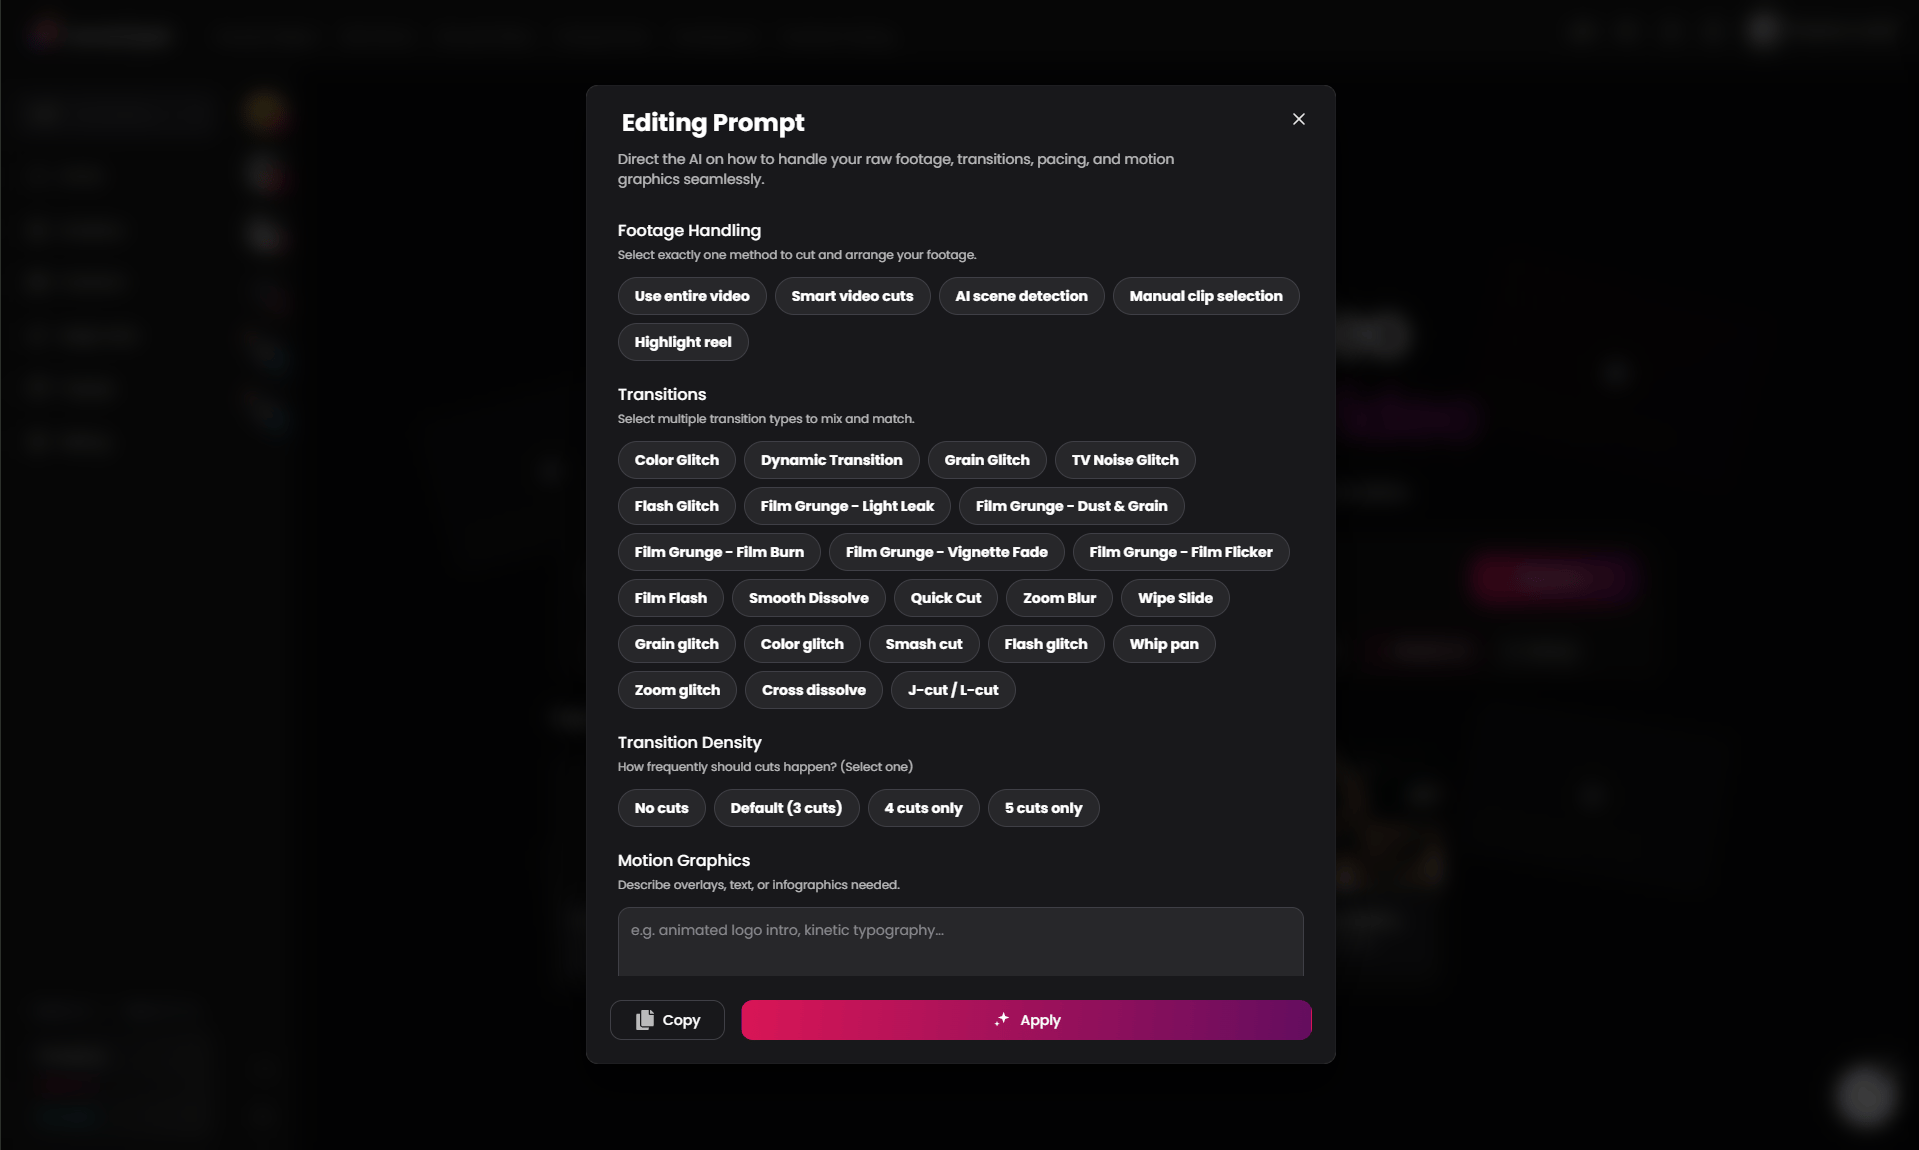
**Option B — Use Custom Edit (Editing Prompt):** Click **Custom Edit** to open the Editing Prompt panel. This gives you full control over every editing decision:
* **Footage Handling** — Choose exactly how AI cuts and arranges your footage:
* Use entire video
* Smart video cuts
* AI scene detection
* Manual clip selection
* Highlight reel
* **Transitions** — Select one or multiple transition styles to mix and match:
* Color Glitch, Dynamic Transition, Grain Glitch, TV Noise Glitch
* Flash Glitch, Film Grunge (Light Leak, Dust & Grain, Film Burn, Vignette Fade, Film Flicker)
* Film Flash, Smooth Dissolve, Quick Cut, Zoom Blur, Wipe Slide
* Smash Cut, Whip Pan, Zoom Glitch, Cross Dissolve, J-cut / L-cut
* **Transition Density** — Control how frequently cuts happen:
* No cuts / Default (3 cuts) / 4 cuts only / 5 cuts only
* **Motion Graphics** — Describe any overlays, text animations, or infographics you want added. Example: *"animated logo intro, kinetic typography for key stats."*
* **Additional Context & Script** — Paste your script or transcript for precise pacing and word-level sync.
Once configured, click **Apply** to lock in your editing directions.
Pro tip: If you're unsure where to start, use one of the suggested prompts on the main screen—Custom Edit, Cinematic Travel Vlog, Dynamic Product, or High-Energy Sports—as a starting point and customize from there. —Custom Step 3: Generate Your Video with AI
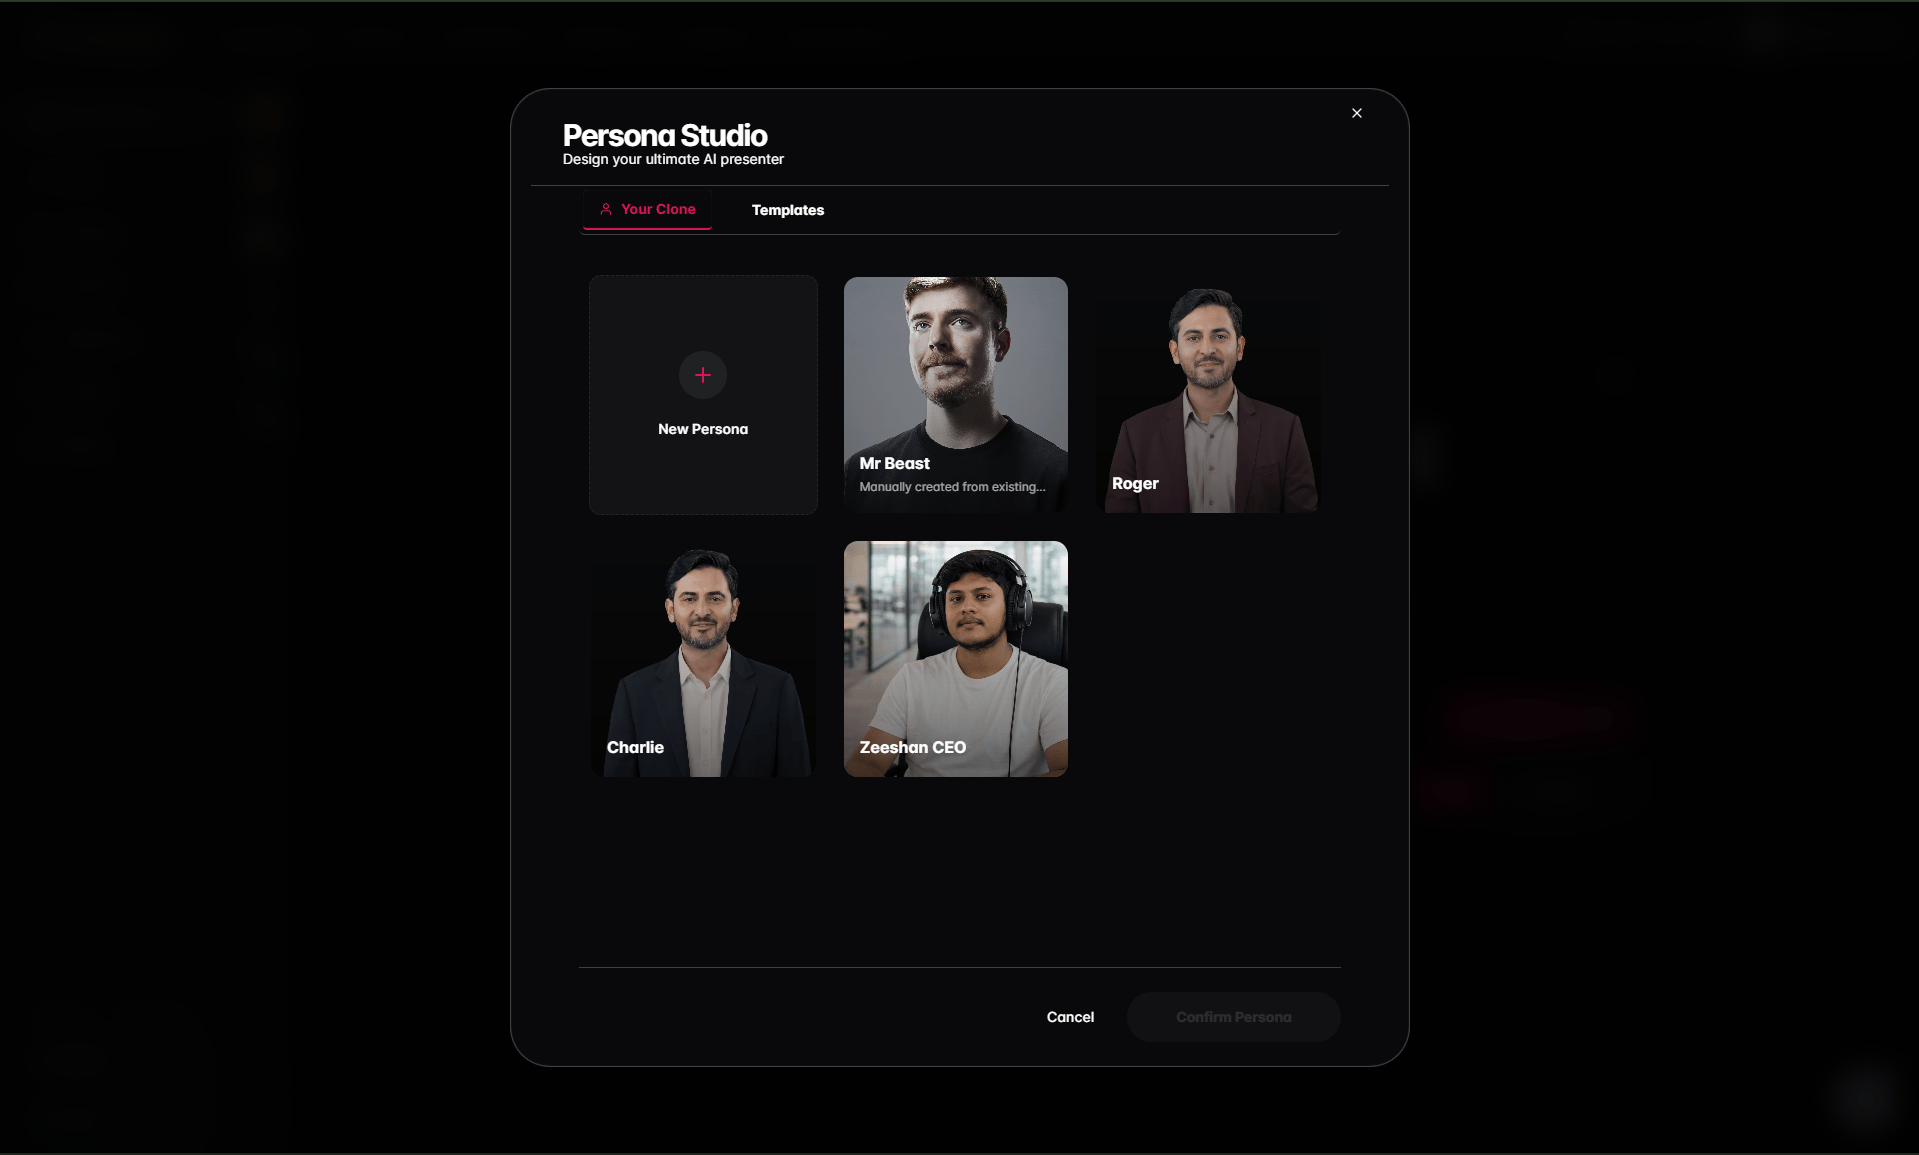
Want an AI presenter to appear in your video? Create a custom avatar that looks and sounds like you or your brand.
* **Persona name** — Name your AI presenter
* **Description** — Define the presenter's role and tone
* **Language** — Choose the speaking language
* **Photo** — Upload a photo to generate your visual avatar
* **Voice clone** — Upload a voice sample so AI replicates your exact voice
Process: Enter persona details → Upload photo → Upload voice clone → Preview avatar → Save Persona
> **Pro tip:** Record your voice sample in a quiet room with a consistent, natural tone. A clean 30–60 second clip produces the most accurate clone.
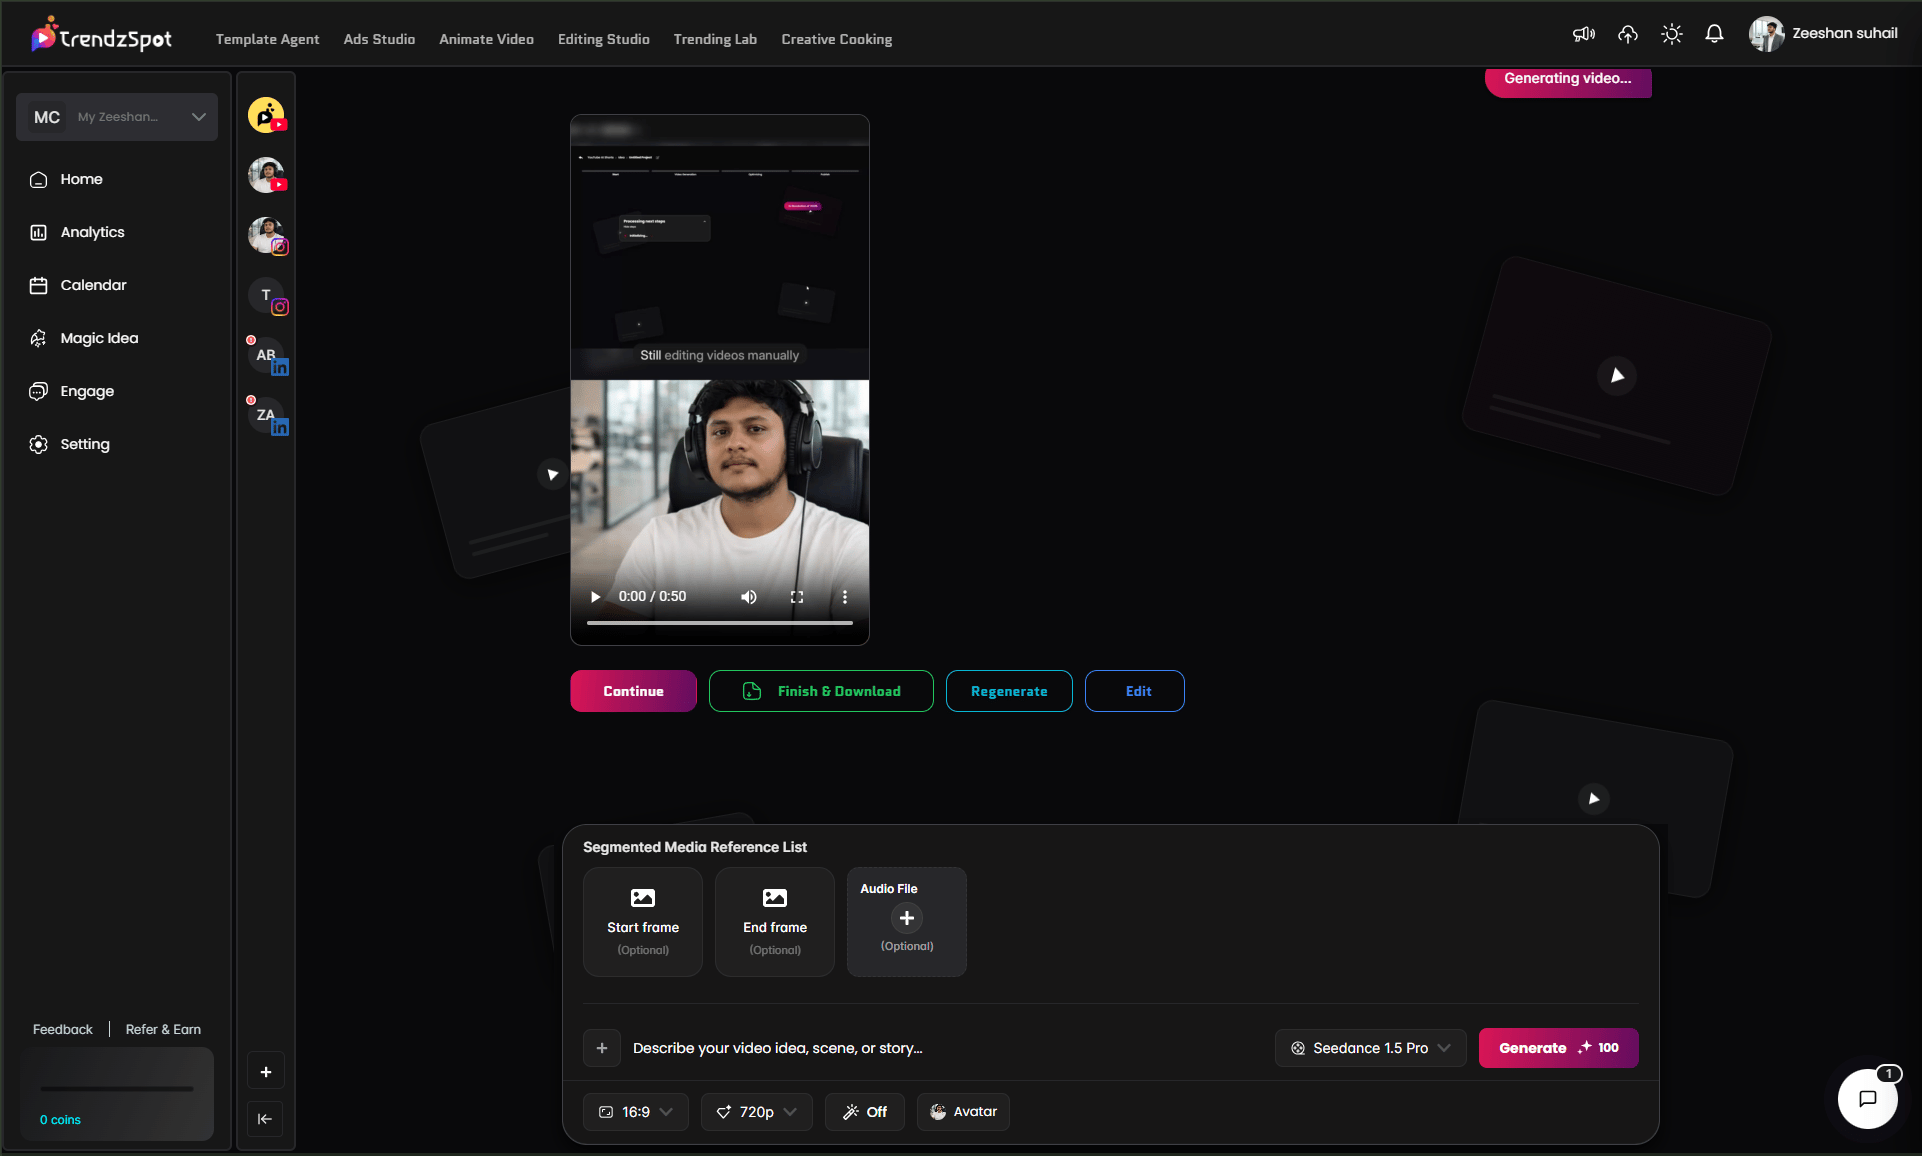
Once your footage is uploaded and your editing directions are set, review the AI-enhanced plan before final generation. Confirm your settings, make any last adjustments, then click **Generate**.
AI automatically builds the complete edited video by adding:
* **Captions** — synced word-by-word to your footage
* **Transitions** — applied at every scene change based on your selections
* **B-roll footage** — relevant background clips inserted automatically
* **Your uploaded media** — images and clips placed exactly where directed
* **Hooks** — attention-grabbing opening sequences to stop the scroll
* **Motion graphics** — animated overlays, text, and infographics
* **Highlighted keywords** — key words and CTAs visually emphasized on screen
**Process:** Review enhanced script → Confirm settings → AI adds captions & transitions → AI inserts B-roll and uploaded media → Apply hooks & motion graphics → Highlight key words → Generate final video
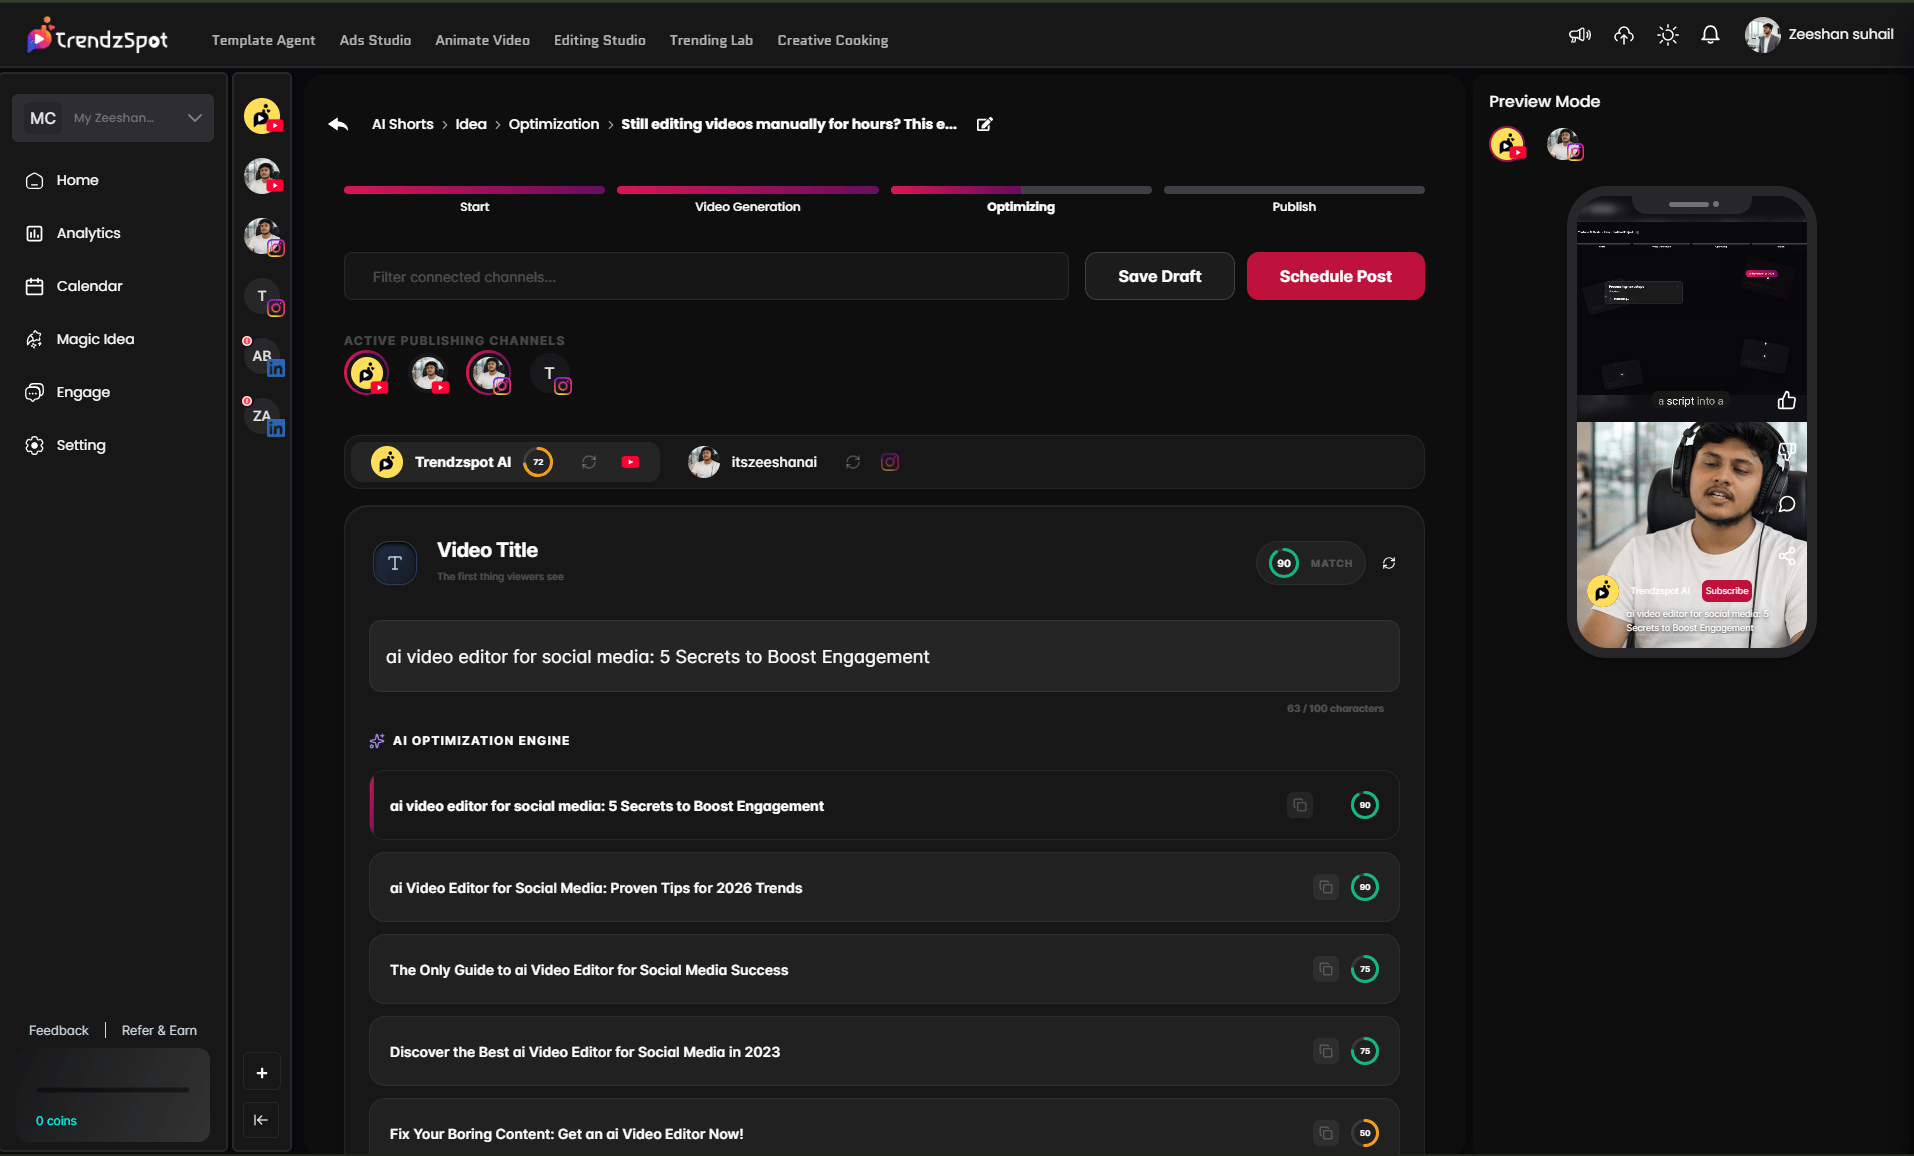
Before publishing, optimize your video's metadata to maximize reach and discoverability on every platform.
* **Title** — AI suggests a platform-optimized title based on your prompt and target audience. Edit it to match your voice.
* **Description** — A full video description is generated automatically, structured for SEO with relevant context and keywords.
* **Keywords** — Platform-specific tags and keywords are recommended based on your content topic and current search trends.
Pro tip: Don't skip this step. A great video with a weak title gets buried. Spend 2 minutes reviewing the AI suggestions and customizing them — it directly affects how many people find your content.
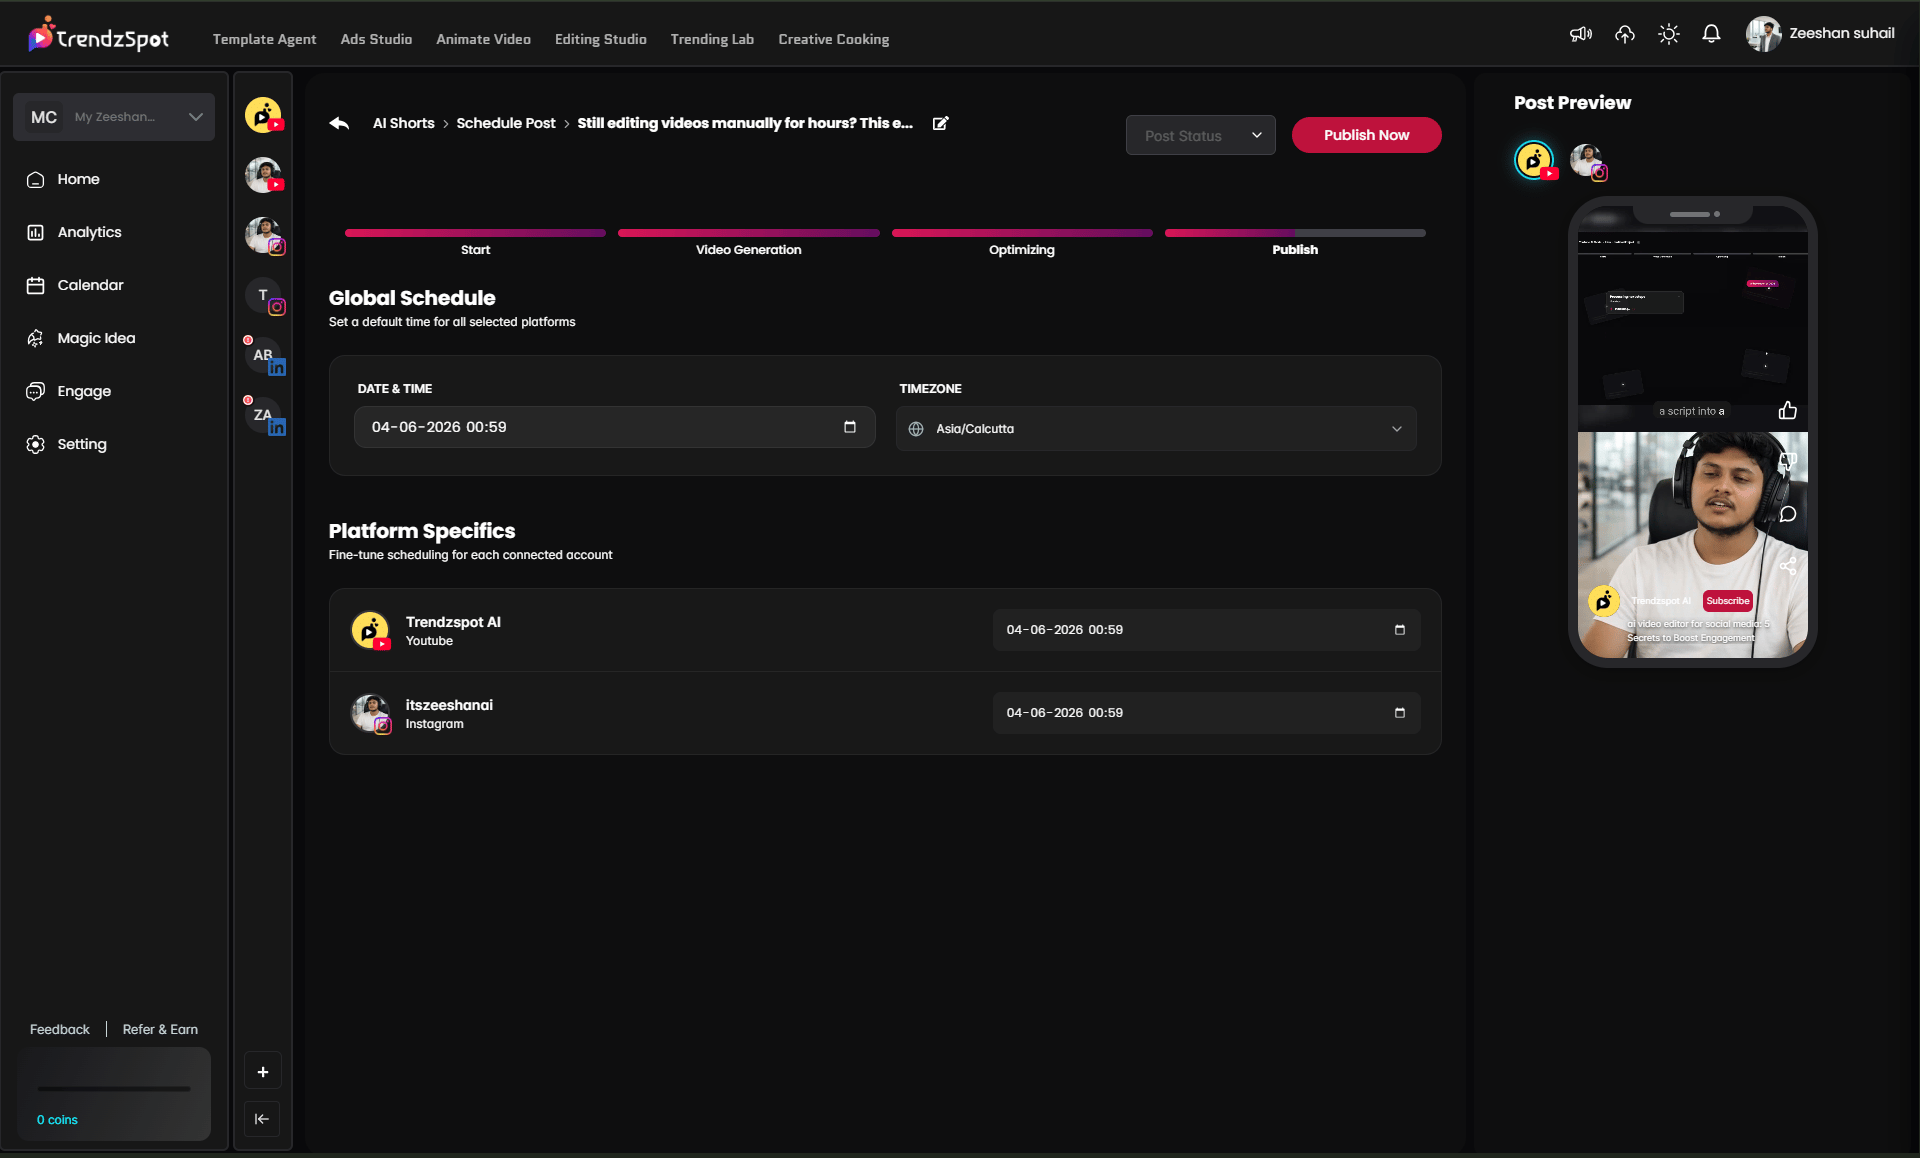
With one click, distribute your video across all your connected social platforms simultaneously — YouTube, TikTok, Instagram, and more.
No downloading, re-uploading, or switching between apps. Your video, title, description, and keywords are pushed to each platform automatically, formatted correctly for each one.
**Pro tip:** Connect all your social accounts in Settings before you start creating. The moment your video is ready, publishing takes seconds.
## Next steps
Now that you have your docs running, explore these key features:
Link YouTube, TikTok, and Instagram to enable direct publishing without leaving the platform.
Distribute a single piece of content to all your channels simultaneously from your AI Board.
Build reusable AI workflows so your content pipeline runs on autopilot. Set it up once, repeat it forever.
Monitor views, watch time, subscriber growth, and revenue trends in one unified dashboard.
**The bottom line:** Most creators waste 80% of their time on tasks that AI can handle in minutes. TrendzSpot AI Core Tools exist to give you that time back—so you can focus on ideas, not execution.
 \
**Option B — Use Custom Edit (Editing Prompt):** Click **Custom Edit** to open the Editing Prompt panel. This gives you full control over every editing decision:
* **Footage Handling** — Choose exactly how AI cuts and arranges your footage:
* Use entire video
* Smart video cuts
* AI scene detection
* Manual clip selection
* Highlight reel
* **Transitions** — Select one or multiple transition styles to mix and match:
* Color Glitch, Dynamic Transition, Grain Glitch, TV Noise Glitch
* Flash Glitch, Film Grunge (Light Leak, Dust & Grain, Film Burn, Vignette Fade, Film Flicker)
* Film Flash, Smooth Dissolve, Quick Cut, Zoom Blur, Wipe Slide
* Smash Cut, Whip Pan, Zoom Glitch, Cross Dissolve, J-cut / L-cut
* **Transition Density** — Control how frequently cuts happen:
* No cuts / Default (3 cuts) / 4 cuts only / 5 cuts only
* **Motion Graphics** — Describe any overlays, text animations, or infographics you want added. Example: *"animated logo intro, kinetic typography for key stats."*
* **Additional Context & Script** — Paste your script or transcript for precise pacing and word-level sync.
Once configured, click **Apply** to lock in your editing directions.
\
**Option B — Use Custom Edit (Editing Prompt):** Click **Custom Edit** to open the Editing Prompt panel. This gives you full control over every editing decision:
* **Footage Handling** — Choose exactly how AI cuts and arranges your footage:
* Use entire video
* Smart video cuts
* AI scene detection
* Manual clip selection
* Highlight reel
* **Transitions** — Select one or multiple transition styles to mix and match:
* Color Glitch, Dynamic Transition, Grain Glitch, TV Noise Glitch
* Flash Glitch, Film Grunge (Light Leak, Dust & Grain, Film Burn, Vignette Fade, Film Flicker)
* Film Flash, Smooth Dissolve, Quick Cut, Zoom Blur, Wipe Slide
* Smash Cut, Whip Pan, Zoom Glitch, Cross Dissolve, J-cut / L-cut
* **Transition Density** — Control how frequently cuts happen:
* No cuts / Default (3 cuts) / 4 cuts only / 5 cuts only
* **Motion Graphics** — Describe any overlays, text animations, or infographics you want added. Example: *"animated logo intro, kinetic typography for key stats."*
* **Additional Context & Script** — Paste your script or transcript for precise pacing and word-level sync.
Once configured, click **Apply** to lock in your editing directions.